
Store Settings
In this section you will customize your online storefront.
You will need to complete the Retailer Profile and Getting Paid sections before moving on to Store Settings
In this article:
- Customize your Store
- Direct your Store to your Custom Domain: Create a CNAME Record at your DNS Provider
To start, click Add new Store
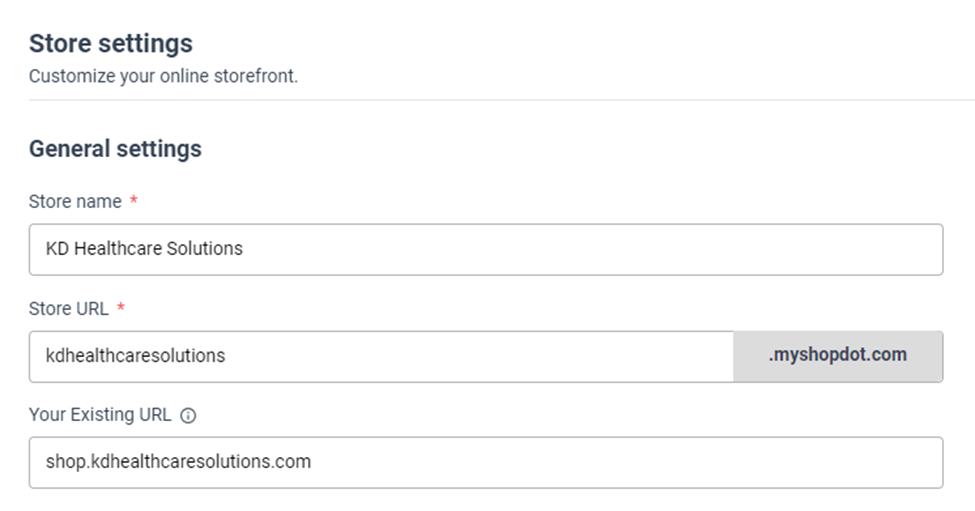
General Settings
| Store name | This is the name of your store | mandatory |
| Sub-domain |
This is your store's online address. It is what appears in your customer's browser address bar when they visit your site. *your Store URL cannot be changed once you click save. If you wish to edit it please email support@shopdotapp.com |
mandatory |
| Custom domain | Instead of using the sub-domain provided to you, you can use a custom domain to redirect to your Store. (Detailed instructions are below.) | option (only available for paid plans) |
| Store categories | These will be the categories that appear on your online storefront for your customers to browse (i.e. Shirts, Pants, Dresses). You can assign these products to these categories in the Store tab. If you do not wish to have categories, your products will appear under All in your online storefront | optional |
Branding
| Upload logo |
Format type: JPEG or PNG Max size is 5MB Not less than 512 x 512 pixels and not more than 1024 x 1024 pixels |
mandatory |
| Favicon | This icon is used in the browser to identity your website. | optional |
Header and Footer
Select colors for your header and footer of your online storefront
| Header background | You can choose any color for your header background | mandatory |
| Header font color |
You can choose between blue and white for your header font color *more colors will be available soon |
mandatory |
| Footer background | You can choose any color for your footer background | mandatory |
| Footer font color |
You can choose between blue and white for your footer font color *more colors will be available soon |
mandatory |
| Home and cart color | You can choose any color for your footer background | mandatory |
Brand Button Colors
| Button color | You can choose any color for your button | mandatory |
| Button text |
You can choose between blue and white for your button font color *more colors will be available soon |
mandatory |
Brand Image
Your banner image (or hero image) will be the image that sits directly beneath the website header on your home screen
- Format type: JPEG or PNG
- Max size is 5MB
- Image size: 1600 x 400 pixels
Banner Overlay Text
- This text will lay over your banner image
- Maximum 240 characters
Direct your online storefront to a Custom Domain
Your online Store comes with its own URL that's your Sub-domain. You can create the pre-fix of your sub-domain but once you save, it cannot be edited. All sub-domains appear as yourname.myshopdot.com as the web address for your online storefront.
You can share that address with your customers, or you can set up a custom domain, e.g. shop.yourdomain.com, to use with your Store instead. Make sure you enter your custom domain correctly under Store Settings (www.yourdomain.com or subdomain.yourdomain.com).
This section walks you through setting up a custom domain for your online Store. You will need access to edit your domain's DNS records or zone file at your DNS hosting provider to follow these steps. If you're not sure what that is or if you have access, reach out to your IT team or web development team and they should be able to help you get this set up.
Create a CNAME Record at Your DNS Provider
- The Store custom domain must be a subdomain of a domain that you own that you have already set up with a DNS hosting provider.
- A CNAME record tells computers that when someone types in your custom domain (shop.yourdomain.com) that you want to actually load your ShopDot Store (yourname.myshopdot.com).
- The CNAME record you'll create is to point the subdomain address you'd like to use, e.g. shop.yourdomain.com, to the Docssite URL in your ShopDot account, e.g. yourname.myshopdot.com.
You do not need to create a directory or subdomain with your website's hosting or on your webserver for the subdomain; when you create the CNAME record that points to your Store site, that redirected URL will be your subdomain.
Find your DNS hosting provider, if you're not sure who that is:
Your DNS hosting provider is likely to be the service where you've registered the domain name or the hosting service where you host your website. MXToolbox's DNS Lookup is a helpful tool to discover public information about your domain — enter your domain there and you'll see a box near the bottom that will show the DNS hosting provider for your domain.
Create the record at your DNS hosting provider
Each DNS hosting provider will have their own terminology and formatting for creating a CNAME record.
- Add A record ONLY if are not using a sub-domain and are directing your entire site to the ShopDot online storefront:
- Type = A record
- Name = @
- Value is ShopDot's IP address: 34.107.230.130
- Add CName: Enter the subdomain you want to use or enter www if you are not using a subdomain. Make sure this matches the custom domain that you entered in the Store Settings.
- Type = CNAME
- Name = subdomain you're using (i.e. shop) or www if you are not using a subdomain
- Value = your ShopDot provided sub-domain (i.e. pawsomepetspdx.myshopdot.com). You can find this under Settings <> Store Settings
For example, to set up a CNAME for shop.kdhealthcaresolutions.com to point kdhealthcaresolutions.myshopdot.com, here's what it would look like on several hosting providers.
GoDaddy

Bluehost

Help for your DNS hosting provider
We’ve included links to some popular providers’ help pages on CNAME or DNS below.
If you don’t see your provider listed here, you need additional help, or you’re not sure how to log in to your account at your DNS provider, you’ll want to reach out to their support. The support team at your DNS provider will be able to help you find the right format if these articles don't get you there — you can send them the link to this article to help them understand what you're looking to do if you're not sure how to explain it.
- GoDaddy: Domains Help: Add a CNAME record
- Namecheap: How to Create a CNAME Record For Your Domain
- Network Solutions: Host Aliases (CNAME Records)
- DNSMadeEasy: CNAME Record
- Google Domains: Create an A or CNAME record
- Hover: Managing DNS records
- Rackspace Cloud DNS: Create DNS records with Cloud DNS
- Bluehost: What Is A CNAME - How To Create & Edit CNAME
These providers may make changes to their knowledge bases or help pages that we aren't aware of. If any of these links do not lead to a help article about CNAME or DNS records for that provider, please let us know at support@shopdotapp.com.
Add the Custom Domain to Store Settings
Head over to Settings > Store Setting > and enter your full custom domain name (e.g. shop.yourdomain.com) in the Custom Domain field. Scroll to the bottom of that page and click Save.
Note: In most cases, the SSL Certificate for your custom domain will be automatically issued within a few minutes of saving these settings and you're all set. DNS propagation can some times take a little longer, especially if you edited a CNAME record that existed previously. If more than a couple of hours have passed and you're not seeing your Store site at your custom domain, reach out to support@shopdotapp.com and we will check into things for you!